|
|
Post by jhornbr225 on Sept 19, 2017 19:48:52 GMT -5
Ramps are good, and I have a set. But I feel it's a bit of a pucker driving up on them. If you drive too far, you've got a big mess.
I have a Miata, and it's too low to drive up on the set that I have. But, before I had the lift, I would drive the car up on some 2x4 blocks to get it up high enough to get the jack under it. Then I would jack it up high enough to get the ramps under it. I would then place the ramps under the tires. It took a little longer, but then I didn't have to worry about a place to put jackstands. If you put stands in the wrong place you can easily deform the bottom of the car.
If I was going to use ramps, I would jack it up, then put them under. I know, it defeats the purpose, but if you drive over the front of the ramps...
|
|
|
|
Post by jhornbr225 on Sept 19, 2017 19:55:39 GMT -5
Also, I know it's too late now, but when I'm doing a big job, engine, transmission, etc., I start an excel spreadsheet. I list all the bolts I remove for each step, with the size and the length for each, and what hole they came out of. If I take a pic, I put the file name of the pic on the spreadsheet, as well as any notes, like need new crush washer, or gasket. I also put each step's bolts in a line, and put masking tape around them so I can identify them later.
Of course, it takes longer. I've come to the conclusion that I work slow. Too slow to make any money working on cars. I do it for myself as a hobby, and for friends, to save them money.
|
|
|
|
Post by flylear45 on Sept 20, 2017 4:54:19 GMT -5
I feel like I was getting a little sloppy by the time I pulled the engine last year. There are a few things where I'm thinking to myself "where would I have put those bolts?" and "why didn't I take a picture of that?" But being a programmer, whenever I'm about to start writing something big, I always start by writing the definitions of the main steps in proper order. Then focus on writing whatever is required to accomplish one of the steps. At work or even in this thread, I make lists of what I need to do. And then adjust those lists as things get done and new things get added. And now that I think about it, I haven't really spent that much time under the car. There isn't a whole lot I can get to under there on my GTP. And I will probably never be enough of a gear head to have a lift. But I am starting to feel like a "car guy" a little bit. Does anybody use ramps? I've never gone under a car on ramps. But it looks like any easy way to get a car high enough to work on it. Opinions? I am not a fan of ramps for my stuff because I have cars that sit too low in front to mount the ramps without hitting them. They are kind of scary to get onto as well. YMMV depending on what you drive. When I was a kid in PA, my Dad had a friend with a grease pit. That was a cool way to work under the car, and I thought about doing one in this garage when I was building it, but they have their own issues. Once I am satisfied that my retirement plans are in order I may spurge on a lift. They make 4 or 2 post units that WILL fit under my ceiling. I have taken apart (completely!) and re-assembled many cars for restoration, and I use different sized zip-lock baggies and strips of paper marked with a sharpie to label what's what. Then the baggies go in plastic bins in the rough order of how they came off. Another label on the bin. I found that system after fighting what you are going through, especially since it can be more than a year before a car gets put back together in a DIY restoration. |
|
|
|
Post by revheadkev on Sept 20, 2017 19:08:08 GMT -5
I use ramps sometimes when just working on the underbody or engine, other times I use jacks and stands when working on the suspension and wheels.
My ramps have stops at the end and 2 cross members spaced further apart so you can feel the tyre sink into it before hitting the end stop. These make sure you don't drive off the end.
|
|
|
|
Post by jhornbr225 on Sept 20, 2017 20:09:10 GMT -5
My ramps have those depressions for the tire too. But I feel that they are not extreme enough to really give me the warm fuzzies when driving up. Not to mention that it's a little more difficult in a manual trans.
Personally, I'll stick with the jacking it up if I ever use the ramps. The nice thing about having the tires sit on the ramps is that it really opens up the space under the car, no jack or jackstands in the way.
To each their own, I say.
|
|
|
|
Post by COMpulse on Sept 21, 2017 8:46:54 GMT -5
I don't think I'll ever mess with ramps. I do almost all of this work by myself. I would need a spotter or some elaborate setup of mirrors to get on the ramps. And even then, I wouldn't be super excited to be under the car.
So, I was reviewing my latest list of to-do stuff on the engine.
Reconnect the transmission bracket.
Reconnect the oil filter housing with new gasket.
Secure all the bell housing bolts. Confirm engine and bell housing are married flush. Install torque converter bolts.
Reconnect the AC compressor, tensioner bracket (with new coolant elbows and RTV), and then the alternator. Put belts on.
Reconnect the coolant lines and vacuum lines, and fuel line.
Reconnect all of the electrical connections.
Then I think it's mostly just adding fluids.
|
|
|
|
Post by COMpulse on Sept 25, 2017 8:45:06 GMT -5
Unfortunately, I had to remove the power steering pump that I was so happy to get on. When mounted to the block, the lines prevent me from getting to the transmission bracket. So, I took the pump back off.
I got the trans bracket 99% attached. One of the bolts into the engine block just doesn't feel like it's in 100%. And I put some weight on the wrench to get it as far as I did. Not sure what's up. I've taken it off, tried a different bolt, I tried loosening the bracket and starting on that bolt first.. I confirmed the bolt fits all the way in the hole on the old engine block. I feel like it's not going in the final millimeter or two on the new block. And I put my weight on that wrench. If I snap a bolt, I'll be set back quite a bit.
Maybe I need to get a pipe cleaner and clean out the hole for the bolt? Or try to blow out any debris with an air compressor? I hate to keep taking the thing back out.
Anyway, I think tonight I may jack up the rear end and try inflating the back tires. No matter what, I should get the rear on stands to deal with the back tires, whatever their condition may be. Then give the compressor back to my coworker.
|
|
|
|
Post by flylear45 on Oct 2, 2017 4:20:53 GMT -5
For a 'quick and dirty' you can just stack a couple flat washers under that bolt head. Otherwise, tap the hole and blow it out or shorten the bolt with a hacksaw. If you shorten it, run a nut on the bolt first, cut it off to the desired length, then file a bevel on the end of the cut off bolt before you thread off the nut. That will ensure a good thread on the shortened part.
|
|
|
|
Post by COMpulse on Oct 2, 2017 6:51:55 GMT -5
That damn bracket had to come off again so I could get to the final bell housing bolt. THE B!TCH BOLT. That required two feet of extensions on my wrench and a flashlight to find the bolt hole. I can't reach the bolt with my hand to feel if it's in all the way or not. Just sorta going by wrench-feel.
When I put the bracket back on again, I got all the bolts on loose, and then tightened the one that was giving me a problem. Feels like it's in all the way now. Tightened the rest. Feels good.
I got the coolant return line connected to the block. I truly hate hose clamps. Had to buy 'Hose Clamp Pliers' to get the job done.
I mounted the AC compressor to the block.
I spent hours cleaning old gasket material off of the oil filter housing and the block. I was going to put the housing back onto the block, but apparently I bought the wrong torque wrench. Needed 3/8" drive, but got 1/2" drive. Also, on my old engine, I notice the oil pressure relief valve appears to be stuck. Hmmm. Wonder if that happened before or after the engine seized.
New thoughts:
Transmission dipstick tube is loose. It's near the firewall. Probably going to take some work.
Exhaust should be challenging. Also against the firewall, behind manifold and head.
I may have destroyed a CV boot for the drive shaft. Not sure, but the weight of the trans was resting on it for a year.
|
|
|
|
Post by COMpulse on Oct 5, 2017 8:44:24 GMT -5
I made a lot of progress this past week. I got the exhaust attached by rocking the engine forward. That gave me enough clearance to put the gasket on over the studs. Then I got under the car and lifted the downpipe until it caught on the studs. Once it was on the studs, I got back on top and managed to pull the downpipe forward enough to slide a nut on the stud and catch the threads. From there, it was just tightening the nuts. Then I replaced the thermostat. I bought a new gasket for the thermostat, and a gasket for the housing. But when I removed the old housing, there was no housing gasket. And the one I bought didn't look like the bolt holes would line up. So I left off the housing gasket. I also decided to find out if the crank turns. It does. I was able to turn the flywheel from under the car. Then I proceeded to start on the wiring harness since I have the engine rocked forward. I've got almost everything plugged back in. I was under the car and I noticed a sensor on the front of the block. On the new engine, the sensor is broken off. There's nothing to grab on to in order to remove the sensor. So I look at the old block, and it's got the sensor still in tact. And, the sensor plugs into a housing that can be removed from the block. So, it was time to remove the housing. Unfortunately, the housing is round, so it requires pliers or vise grips. And there's no room to get to it with the starter in the way. So, I had to remove the starter dust cover and the starter. Removing the starter is scary. It's like 20 pounds of dense metal hanging above your face. Anyway, first I loosened the housing from the old block to make sure I would be able to remove it from the new block. No problem. It was tight but I got it loosened. Then back under the car. I finally get a solid grip on this housing and get it loose. I finally remove it and, SURPRISE GOLDEN SHOWER OF COOLANT IN MY FACE, as well as on my tools and on the starter I had laying next to me. It turns out that sensor is the front knock sensor. So I put my drain pan under the old block and removed the housing from the old block. I put some RTV on it and transferred it to the new block. Then put the starter back on. Perhaps scarier than removing it, since the first bolt also wants to fall on your face. I did drop the starter once. Hope it's fine. If not, I'm getting better at this kind of thing. Here's a shot of the broken sensor from the new engine. I mounted it to the old engine just to show where it goes. 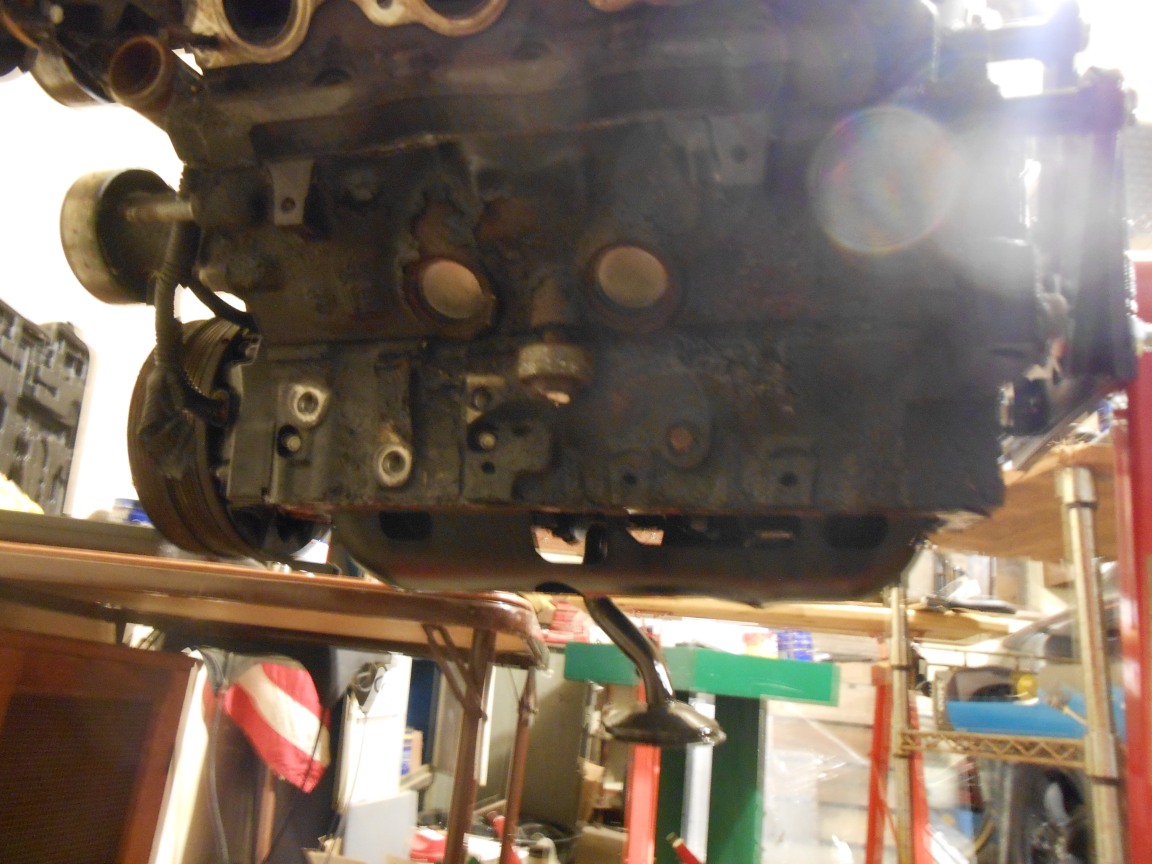 So I've almost got everything reconnected, but I have a MYSTERY WIRE. I'm not sure where this guy goes just yet. This is on the driver side, in front of the strut tower. I'm trying to remember if there was a plug like this on the passenger side. 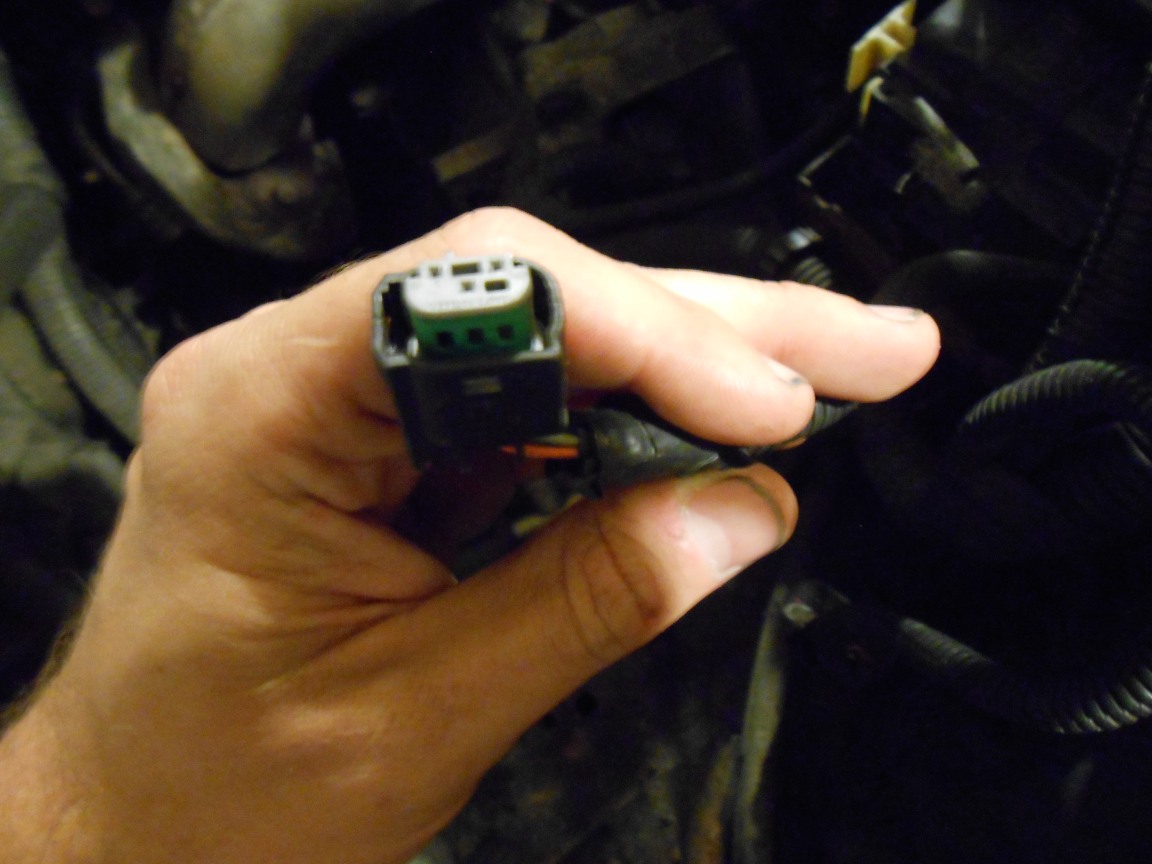 And I still need to connect the wires for the starter and some ground wires. And lastly, I have one particular connector where there's a missing plastic clip. It's the tube that connects the 'Evap Purge Solenoid' to the 'Evap Canister' I think. And here's my current to-do list: Secure trans dispstick tube. Reconnect the oil filter housing with new gasket. Reconnect the power steering pump. Reconnect the tensioner bracket with new coolant elbows and RTV blue/black. Reconnect the alternator. Put belts on. Install torque converter bolts. Install lower motor mount nuts. Reconnect all of the electrical connections. Drain the radiator. Reconnect the coolant inlet hose, coolant overflow, and fuel rail. Reconnect upper motor mounts. Go to junkyard for Evap tube clip and Bellhousing inspection cover. Check / replace CV boot on passenger side. |
|
|
|
Post by flylear45 on Oct 5, 2017 15:22:28 GMT -5
Getting there!
I would locktite those converter bolts when you install them. You don't want them loosening up on you.
|
|
|
|
Post by COMpulse on Oct 12, 2017 9:01:19 GMT -5
There's a chill in the air. I can feel time starting to run out. But I still plan on beating the clock.
Going to the junkyard this weekend to pull some parts.
I figured out the mystery connector. It goes to the EBTCM. Electronic Brake & Traction Control Module. Basically, Stabilitrak.
I got some loctite, and started using that on any bolts that looked like the threads might have had thread-lock on them before.
I reattached the oil filter housing with a new gasket. I had purchased the torque wrench for this specifically. But I couldn't fit the damn wrench where I needed it. So I just tightened the shit out of the bolts within reason.
I got the ground wires back on, and also the starter wires. I had to review the pictures that I took to figure out the proper wiring. I think I got it right. The only remaining electrical connection to secure is the alternator, and that's easy.
I re-attached the PS pump, and then the tension bracket and replaced the coolant elbows. The seal on them didn't feel great, so if I start leaking coolant that will be the first spot to check. The alternator goes on top of the tensioner bracket, so that's probably next.
I thought I had attached the coolant outlet hose (out from engine back to radiator), but it turns out I attached the coolant inlet hose. Apparently the thermostat is on the outlet side of the block. Probably have to take it off again either to flush the radiator or to pre-fill the block with coolant.
I've got a new dipstick tube for the trans coming in the mail tomorrow. I think I broke a little metal retainer clip off the tube, which is used to secure the tube. I wish I had dealt with this particular issue before putting the block back in.
So the new list is:
Attach alternator.
Put belts on.
Replace trans dipstick tube.
Attach heater hoses. (new gaskets?)
Flush radiator somehow.
Attach coolant hoses.
Reconnect motor mounts.
Put torque converter / flywheel bolts in (loctite).
Attach dust cover to bellhousing.
Attach fuel line to fuel rail, evap line to purge solenoid)
Drain oil pan. Fill engine and filter with oil.
Trans fluid?
|
|
|
|
Post by philg on Oct 12, 2017 15:00:43 GMT -5
To flush the rad, I wouldx just take it to a rad shop, not too expensive to have them do it. The only other way will be to have the car running first as a cold flush will do very little.
|
|
|
|
Post by COMpulse on Oct 12, 2017 16:01:46 GMT -5
I just wanted to get any junk out of radiator. It's been sitting for 3 years. For all I know, the fluid all evaporated.
But I agree. I don't have any way to dispose of coolant. AutoZone takes oil and trans fluid but not coolant. So I'll probably just end up going to the oil change place and get the trans fluid and coolant flushed.
Oh yeah, and I need a F'ing battery..
|
|
|
|
Post by jhornbr225 on Oct 12, 2017 19:22:46 GMT -5
I found out that the next city over (Canton, OH), has a great recycling place. They take almost everything. Old electronics, antifreeze, oil, used oil filters, tires. Although it's weird, they say fluorescent bulbs are hazardous household waste. They only take them on Tuesdays and Thursdays. And you have to make an appointment. I called for an appointment, and they told me I could come in something like 3 weeks. What? But I went on a normal day, Monday, Wednesday, or Friday, and I had the bulbs in the back of the truck. And they took them! Also they are only open from 10AM to 2 or 3 PM. And it's free!
They also say they don't take CRT TV's or computer monitors anymore. I had one in the back of the truck this week, and they took it.
In other words, Google for local recycling places, you might be surprised.
|
|